This blog post also is available in German.
Jump to Recipe Print RecipeThis lavender lemon kombucha is the perfect spring drink. Sparkling, light, refreshing and thanks to lavender flowers it tastes really nice. Just like you expect spring to taste like. And just by the way, kombucha is also extremely healthy for your intestines because of the probiotic bacteria in it. The preparation is very simple and safe to succeed. You need a pinch of Provence and some holiday feeling? Then there is no way around this lavender lemon kombucha!

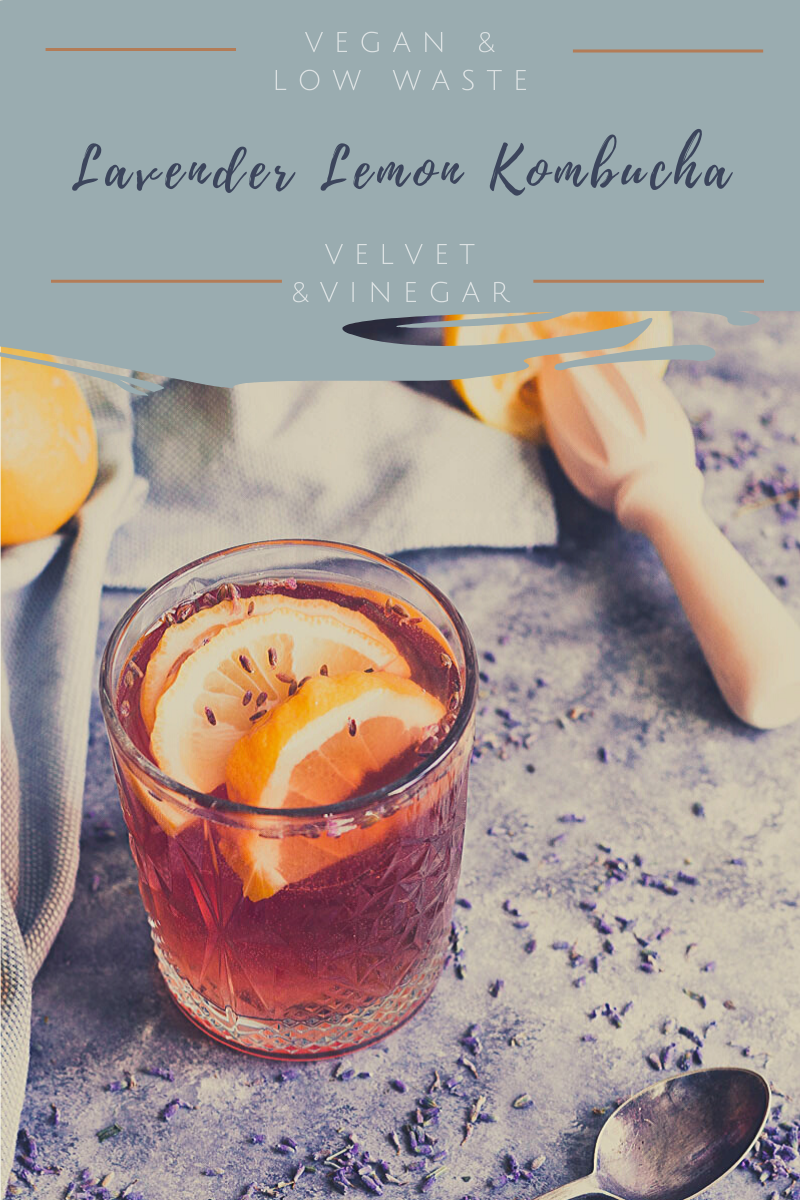
Kombucha with lemon and lavender
Experimenting with kombucha has been on my to-do list since last year. This year I finally started the project. Why did it take so long? Somehow I always had a little respect for fermentation and making kombucha myself. Thought it was hard or I wouldn’t be able to do it. I quickly had to realize that this was not the case. Making kombucha yourself is not difficult at all and doesn’t need any fancy accessories. Sure, you need a few basic ingredients and tools, but nothing unusual.
Soda isn`t really our thing. But in between, I like to drink something different than just water. For example a homemade lemonade or iced tea. When I read about kombucha for the first time, I knew that I wanted to try this trendy drink. But somehow it wasn’t so common here in Switzerland. In the big supermarkets there was practically no kombucha – except for one sort – and running to the health food store every time was somehow too time consuming for me. So I soon realized that I wanted to make my own kombucha. So my love for kombucha and the small kombucha brewery at home came into being.
A little anecdote about that. My husband asked me the other day, “How long do you plan to keep making this stuff?” My answer: “Forever and ever!”
For clarification, he doesn’t drink kombucha, respectively he hasn’t acquired a taste for it yet. And I think the standing around vessel is bothering him. In the meantime he has come to terms with the fact that it’s a “never-ending” project.

Lavender Lemon Kombucha
The idea for this lavender and lemon kombucha came rather by chance because I just really wanted something sparkling and refreshing. Moreover, lavender always reminds me so much of spring, of blooming lavender fields in Provence. And as this year’s holidays will be a bit overshadowed by the Corona pandemic, it’s even nicer to have lavender and lemon kombucha to bring some holiday feeling right into your home. Don’t you agree?
In the meantime, I have made this lavender lemon kombucha at least three times and each time I’m amazed at how delicious and refreshing it tastes.
And today I would like to tell you how you can – quite simply – conjure your own spring-like lavender lemon kombucha at home.
What is kombucha?
But before we start brewing kombucha, I would like to explain to you in a little more detail what kombucha is exactly.
Kombucha is a drink originally from Japan. It`s made by fermenting sweetened tea using a so-called kombucha fungus. During the fermentation process, the fungus metabolizes the sugar added to the tea into alcohol and carbon dioxide. This also explains the development of carbonic acid during fermentation in closed vessels (more on this under secondary fermentation).
The tea varieties used for the production of kombucha are classically green tea or black tea. Kombucha has a minimum alcohol content due to the alcoholic fermentation. The content can vary from about 0.5 to 2 %. For this reason, kombucha isn’t suitable for children, teenagers, and pregnant women.

Why you should drink kombucha
You already know that kombucha is made by fermentation. This process produces probiotic bacteria and healthy acid compounds (lactic acid, acetic acid). Especially the probiotic bacteria are a blessing for our intestines. Kombucha thus supports our intestinal flora by contributing healthy intestinal bacteria. This also stimulates and improves digestion.
Kombucha also contains essential nutrients, minerals and vitamins. Especially B vitamins, such as vitamins B1, B2, B6 and B12 can be found in the drink. But also vitamin C or the trace elements zinc and manganese. Depending on the way of preparation and the ingredients used, the nutrients can vary.
Kombucha is therefore above all a benefit for our intestines. However, it also strengthens our immune system – due to the antioxidants it contains – and can be helpful in weight loss, as it stimulates digestion.
Very important: If you have never or only very rarely drunk kombucha, I recommend that you start very slowly. One small glass or shot glass per day is enough to start with. Your intestine has to get used to it first. If you drink too much at once, you may get diarrhea. You can then increase the amount step by step.
How to make your own kombucha
It doesn’t take much to make kombucha by yourself. Here is a small list of the necessary ingredients:
- a SCOBY = kombucha / tea fungus
- loose black or green tea
- sugar
- a vessel for fermentation
- a sieve
- a cotton cloth, where air can penetrate
- rubber band
If you`re lucky, you`ll have someone in your circle of friends who can give you a kombucha fungus. Kombucha production naturally produces new fungus, which you can then give as a gift. If you cannot find one, please contact me via e-mail. From time to time I have some to give away. Otherwise, you can buy the kombucha fungus. I would always pay attention to good quality when buying a scoby.
The only big investment you probably have to make is a fermenting vessel. I recommend that you invest in a slightly larger vessel right from the start. Firstly, because the Kombucha mushroom likes to have a lot of space and secondly because you can make a larger batch at once. I can fit about 2.5 liters into my container and it is enough for me personally, as I drink alone. But also 5-liter containers are very practical. My vessel is actually a lemonade dispenser and has a drain cock, which I find very practical. So I can easily tap kombucha or fill it into bottles.

First fermentation – a piece of cake
Kombucha fermentation is really not complicated, I promise you. And if you follow the instructions exactly, it will go like clockwork. However, there are a few important things to remember. A little further down, I`ll also tell you which mistakes you should absolutely avoid.
In Kombucha production, we distinguish between first and second fermentation. First fermentation is the actual traditional kombucha production. In principle, every Kombucha is ready to drink after the first fermentation and a second fermentation is not absolutely necessary. However, anyone who likes to drink sparkling or flavoured Kombucha needs a second fermentation.
Let us first look at the first fermentation. For this you need the above mentioned ingredients. You will find the exact quantities in the recipe below.
- Bring water to boil and add tea leaves.
- Let steep and remove tea leaves with a sieve.
- Let the tea cool down
- Add scoby, 10% starter liquid and cooled tea to your fermenting vessel.
- Cover your vessel with a cotton cloth, which you attach with a rubber band.
- Ferment the kombucha.
I’ll deal with the most important questions in the section after the next. You can find a video tutorial here.
Second fermentation – here`s where the magic begins
Do you want flavored kombucha – like this lavender lemon kombucha – or a really fizzy kombucha? Then you have to second ferment your kombucha. I’ll tell you how to do it right away.
After you have prepared your kombucha as described above, you can spice it up a bit by adding juices, other flavored teas, fruits, herbs, etc. To do this, simply tap off the desired amount of kombucha and add the other ingredients.
In the case of this lavender lemon kombucha, I simply added dried lavender flowers and lemon juice after the first fermentation process and let the whole thing ferment for another 2-3 days.
Do you want a sparkling kombucha? Then I recommend doing the second fermentation in a bottle. To do this, fill your kombucha in a glass bottle, add the other ingredients you want and seal the bottle airtight. Let the kombucha ferment again for a few days under airtight seal. This prevents carbon dioxide from escaping. The following things are important for bottle fermentation:
- Choose a bottle with a swing stopper that can be closed as airtight as possible.
- Make sure to use a good quality and thick glass bottle to prevent bursting.
- Don’t forget to open your bottle from time to time, to let air and pressure escape.
- Keep the first fermentation short at 3-5 days.
Very important: If you second ferment your kombucha, then keep the first fermentation a little shorter. Kombucha that has been fermented too long becomes sour and then tastes more like vinegar, i.e. not as tasty.

FAQ about kombucha
Here I would like to briefly answer the most common questions about Kombucha that I too asked myself at the beginning.
What tea for kombucha?
Green tea or black tea is best. I’ve also seen variations with white tea or hibiscus tea. It should work, but I personally believe that it tastes and works best with green or black tea. When buying tea, make sure that it’s of good organic quality.
I personally prefer loose tea, as it is more sustainable. But you can also use teabags.
Can I use flavored tea?
NO!
Flavored teas, such as chai, or other teas containing essential oils don’t belong in kombucha. At least not into the first fermentation! You can add them in the second round. The essential oils or aromas can bring the fungus out of its natural balance and inhibit its growth due to their antimicrobial effect.
How much tea do I need & how long to I need to let it steep?
You will do well with 8g of tea per liter of water. You can, of course, take more, then the whole thing will simply be stronger. How long you let the tea steep is up to you. You have to find the optimal time for yourself. In principle, I would recommend a brewing time of 15 to 20 minutes. But you can also let it steep longer. The longer you let the tea steep, the darker and stronger it gets. Therefore I would recommend 15-20 minutes as a start.
How much sugar do I need?
The Kombucha fungus needs sugar as food to be able to work at all. There is also a risk of mold growth if you do not add enough sugar. I recommend at least 80g sugar per liter of kombucha. Others even take 90 to 100g. Personally I do well with 80g.

Can I leave out the sugar or use sugar alternatives?
NO!
As you may know, I use practically no refined sugar in my recipes. And if you ever find it in a recipe, it’s because it’s either essential or I find it to be the best option.
Kombucha making requires sugar. The fungus can’t metabolize sugar substitutes, so they’re not an option. I always use organic quality cane sugar. For a while, I used coconut blossom sugar, but in the end, it was too expensive. At 2 liters of kombucha per week. Instead of cane sugar you can of course use molasses, maple syrup, agave syrup or other sweeteners, as long as they contain sugar in some form. Over time, this will simply cost you more money, as sugar is much cheaper. Furthermore, I don’t see it so narrowly, since the kombucha fungus metabolizes most of the added sugar anyway.
What is the starter liquid & how much of it do I need?
If a kombucha recipe mentions starter or preparation liquid, then the liquid in which the kombucha fungus was delivered is meant. If you get the mushroom from a friend, always ask for a little starter fluid. Actually, this is nothing else than ready-made kombucha.
So if you haven`t received any solution, you can theoretically also add purchased Kombucha. The first fermentation can then take a little longer, as kombucha that is ready for sale is usually pasteurized for a longer shelf life. This kills some of the active bacteria and fungi.
By the way, you need a starter liquid for every batch of kombucha. So always remember to save some of the fermented kombucha so that you can start a new production.
The rule of thumb is that you need 10% kombucha starter for a new kombucha. In other words, if you make 2 liters of kombucha, you will need 200ml starter liquid. For 1 liter 100ml, for 5 liters 500ml and so on. The rule can be a bit different if you have very sour kombucha that tastes almost like vinegar, then it takes a bit less.

When is my kombucha ready to drink?
This is left to your taste and depends very much on the temperature at which the kombucha is fermented. The warmer it is, the more active the fungus is. In principle, it likes temperatures around 20° Celsius, but it is most active at around 23° Celsius. Cooler temperatures weaken the fungus somewhat, the fermentation takes longer. Therefore, if possible, let it ferment in a warmer but dark place. Avoid direct sunlight.
When you like your kombucha best, you have to find out for yourself. Optimal is 5-7 days fermentation time, sometimes 10 days. I would rather avoid longer than 10 days. It is best to try a little bit every day to find the right time. If you are planning a second round of fermentation in the bottle, I would fill the Kombucha into the bottle after only 3-5 days.
My kombucha has mold – what should I do?
Clean working is the be-all and end-all in kombucha production. It’s best to kill all germs at the beginning of production. To do this, you should wash your fermentation vessel with hot water and sterilize it in the oven at 200° Celsius for 10 minutes. Always work with clean hands and materials.
If you adhere to these hygiene measures, mold formation is very rare in kombucha production. This is because as long as the fungus has enough sugar, it forms natural substances that kill off mold spores. It is important that you stick to the amount of sugar and also check again and again that the fungus is covered with liquid. If it is not covered with liquid, mold can form in these places.
By the way, mold is either green or black! Everything else can occur due to the yeast spores in the kombucha, which also belong there. So before you panic about mold, do a quick google research and look at some pictures of mold on kombucha. Sometimes these are natural processes. Unless it is green or black!
If it really is mold, there is only one solution: Everything has to go in the dust bin and you have to start all over again.

Avoid these mistakes
There are a few important things you should consider when making kombucha:
- Always let the tea cool down. If the tea is too hot it will kill your kombucha fungus.
- Stick to the hygiene measurements mentioned above.
- Don`t use andy flavored tea brands.
- Feed the fungus with enough sugar.
- Make sure the fungus can breathe but no contamination from outside can occur.
- Make sure the fungus is always covered with liquid.
Low waste tips for lavender lemon kombucha
Making kombucha yourself is already sustainable per se because you no longer have any deposit or disposable bottles of purchased kombucha. But here are a few tips on how to make the production of lavender lemon kombucha even more sustainable:
- Try to get a kombucha fungus from somebody you know. The bought ones mostly come packed in plastic.
- Buy loose tea leaves without packaging in your local tea or bulk store.
- Buy lemons without nets at the farmers market.
- Buy loose unpacked lavender blossoms in the pharmacy or health store.
- Buy unpacked cane sugar in the bulk store.

Alternatives to the ingredients used for the lavender lemon kombucha
Lavender’s not for everyone. No problem. You don’t necessarily have to brew a lavender lemon kombucha, instead you can let your creativity run wild. Maybe you prefer ginger and lemon? Or orange cinnamon? Either way, there are countless combinations. I’m experimenting with cucumber, lemon balm, and mint. Below I have linked a few other kombucha recipes.
Lavender Lemon Kombucha – why you should try it
- healthy for your gut
- vegan
- only natural ingredients
- tangy and refreshing
- super aromatic
- low waste
- homemade
- a healthy option to soda
- without any additional sugar
- easy to prepare
Other yummy kombucha recipes:
- You can make these infused water with kombucha instead of water.
- Peach Pie Kombucha
- Blueberry Kombucha
If you are trying this lavender lemon kombucha, I would love your feedback here in the comments. If you share your creation of this recipe on Instagram, please don’t forget to link @velvetandvinegar and use the hashtag #velvetandvinegar. So my community and I won’t miss your contribution.
By subscribing to my newsletter, you also get access to my ebook and other freebies, as well as exclusive offers & content directly to your inbox. I also regularly send you the latest recipes, personal insights and interesting tips and tricks on vegan nutrition and sustainability.
You can also contact me directly via the newsletter by simply replying to my emails. This allows me to respond more specifically to your questions and wishes. I am happy to welcome you as part of my community!
Read you soon
Your Sarah

Lavender Lemon Kombucha
Equipment
- water heater (optional)
- fermentation vessel
- cotton cloth
- rubber band
Ingredients
First fermentation
- 2 l water
- 16 g green tea organic
- 160 g cane sugar organic
- 1 kombucha fungus organic
- 200 ml starter liquid organic
Second Fermentation
- 1 l kombucha organic
- 2 tbsp fresh lemon juice organic
- 2 tsp dried lavender blossoms organic
Instructions
- Rinse fermentation vessel with hot water and sterilize in the oven at 200° Celsius for approx. 10-15 minutes.
- Bring water to the boil in a kettle. Pour into a vessel, add tea leaves and dissolve sugar in the still hot water.
- Let tea steep for 20 minutes. Then remove the tea leaves with a sieve and let the tea cool down completely.
- Pour the kombucha fungus and starter liquid into the cooled fermentation vessel. Pour in cold tea. Cover the opening of the fermentation vessel with an air-permeable cotton cloth and fasten with a rubber band. Let kombucha ferment for about 3 days in a place protected from direct sunlight. Check from time to time that the fungus is covered with liquid.
- Pour kombucha into a glass bottle, add lemon juice and lavender flowers. Close the bottle hermetically and place in the refrigerator for 2-3 days. Vent from time to time. Do not forget to keep about 100-200ml of the already brewed Kombucha for the next batch.
Notes
Do you have a Pinterest account? Then you can find me here and of course pin this picture!